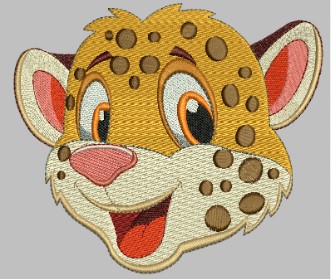
Have you ever looked at a beautifully stitched logo on a hat, polo shirt, or bag and wondered how it got there? The secret lies in embroidery file conversion. This process takes your regular image logo and transforms it into a stitch-ready file that embroidery machines can understand. Whether you’re a small business owner, creative entrepreneur, or hobbyist, converting your logo into an embroidery file is the first step in bringing your brand to life through thread.
In this article, we’ll walk you through the magic of logo file conversion for embroidery, why it’s important, and how to get started—easily and affordably.
What is Logo File Conversion for Embroidery?
Your logo might be in a common file format like JPG, PNG, or SVG. While these are perfect for digital and print use, embroidery machines can’t read them. These machines require specific file formats like DST, PES, EXP, JEF, or VP3—known as embroidery file formats.
Logo file conversion is the process of translating your existing logo file into one of these stitch-based formats using embroidery digitizing software or professional digitizing services.
Why Convert Your Logo for Embroidery?
Whether you’re creating custom uniforms, promotional products, or personal merchandise, embroidery adds a premium and lasting touch to your logo. But first, you need to convert that logo into a format your embroidery machine understands.
Here’s what conversion allows you to do:
-
Use your logo on apparel and accessories
-
Maintain brand consistency across embroidered items
-
Create durable, professional-looking pieces
-
Avoid distortion or poor stitching
Without proper file conversion, even the most beautiful logo can turn into a stitching nightmare—thread breaks, misalignment, or unreadable text.
The Embroidery File Conversion Process
You might be thinking, “Okay, I have a logo—how do I turn it into embroidery?” Here’s a simplified breakdown of the process:
1. Choose the Right Image File
Start with a high-resolution version of your logo—preferably in vector format (SVG, AI, or EPS). Clean lines and solid colors work best for digitizing.
2. Use Embroidery Digitizing Software
Programs like Wilcom, Hatch, SewArt, and Embird allow you to import your logo and manually assign stitches to each area. You’ll decide:
-
Stitch type (satin, fill, run)
-
Stitch direction and pathing
-
Color changes
-
Underlay and density
If this sounds a bit complex, don’t worry! You can also…
3. Hire a Professional Digitizing Service
Services like Absolute Digitizing offer affordable and fast logo digitizing. All you do is send them your logo, and they’ll send you back a stitch-ready file in the format of your choice.
4. Test and Stitch
Once you have your converted file, upload it to your embroidery machine, test it on a sample fabric, and make any necessary adjustments before starting production.
Common Embroidery File Formats
Depending on your machine, you’ll need a specific embroidery file format. Here’s a quick guide:
Always confirm which format your machine supports before ordering or creating your file.
Benefits of Professional Logo Digitizing
While DIY software tools are available, hiring a professional digitizer comes with major advantages:
-
Clean, accurate stitch paths
-
Perfect replication of fine details
-
Optimized files for your fabric type and machine
-
Time and cost savings by avoiding trial and error
-
Professional look that enhances your brand image
Digitizing isn’t just a technical task—it’s an art that balances aesthetics and machine logic. Experienced digitizers know how to make your logo look great in thread.
Tips for a Flawless Embroidered Logo
Before you jump into production, here are some helpful tips:
Keep It Simple
Intricate gradients, tiny fonts, or excessive details don’t translate well into embroidery. Simplify your logo if necessary.
Match the Fabric
Let your digitizer know what fabric you’ll be using. Denim, cotton, fleece, or stretchy materials all need different stitch settings.
Consider Thread Colors
Choose thread colors that closely match your brand palette. Remember that thread has a shine that can slightly change how colors appear.
Always Test First
Run a test stitch-out before producing in bulk. This helps catch any alignment or tension issues early.
How Much Does Logo Digitizing Cost?
Digitizing a logo for embroidery is surprisingly affordable. Most services charge between $10 to $30, depending on:
-
Logo complexity
-
Stitch count
-
Turnaround time
-
File format
Some providers even offer free revisions or volume discounts if you have multiple logos or need regular work.
Where to Get Your Logo Digitized?
If you’re looking for a trusted and reliable service to convert your logo into a beautiful embroidery file, consider these top options:
Absolute Digitizing
Known for professional-quality digitizing, fast turnaround (within 12-24 hours), and competitive pricing starting at just $10.
Digitizing Buddy
Great for quick, accurate conversions with responsive customer support and a focus on small businesses.
Both companies offer files in multiple formats and accommodate custom requests, ensuring you get exactly what your project needs.
Final Thoughts
Embroidery offers a tactile, timeless way to showcase your brand—but it all starts with the right file. Converting your logo into a stitch-ready embroidery format is a crucial step that ensures your design is reproduced accurately, beautifully, and professionally.
So whether you’re decking out your team in branded uniforms or creating personalized gifts, don’t skip the digitizing process. Trust an expert, or learn the craft yourself, and get ready to see your logo shine—one stitch at a time.
Would you like this article optimized further for a website, blog, or service page? I can include specific keywords or link to relevant services. Just let me know!